Archives

Food blogging: take two

For my foods week 10 assignment, I decided to make sugar cookies. I decided to make these cookies in particular, because a year or two ago I needed to make some sort of food for something (a school event, maybe) and I found this recipe online. They turned out to be pretty good, and the recipe didn’t require many ingredients/the ones it did need were things that you would have on a regular basis. Perfect for Covid! They’ve been my go to cookies ever since.

**Note: I’ve discovered that replacing the butter with coconut oil, you get some pretty good lactose-free coconut cookies!

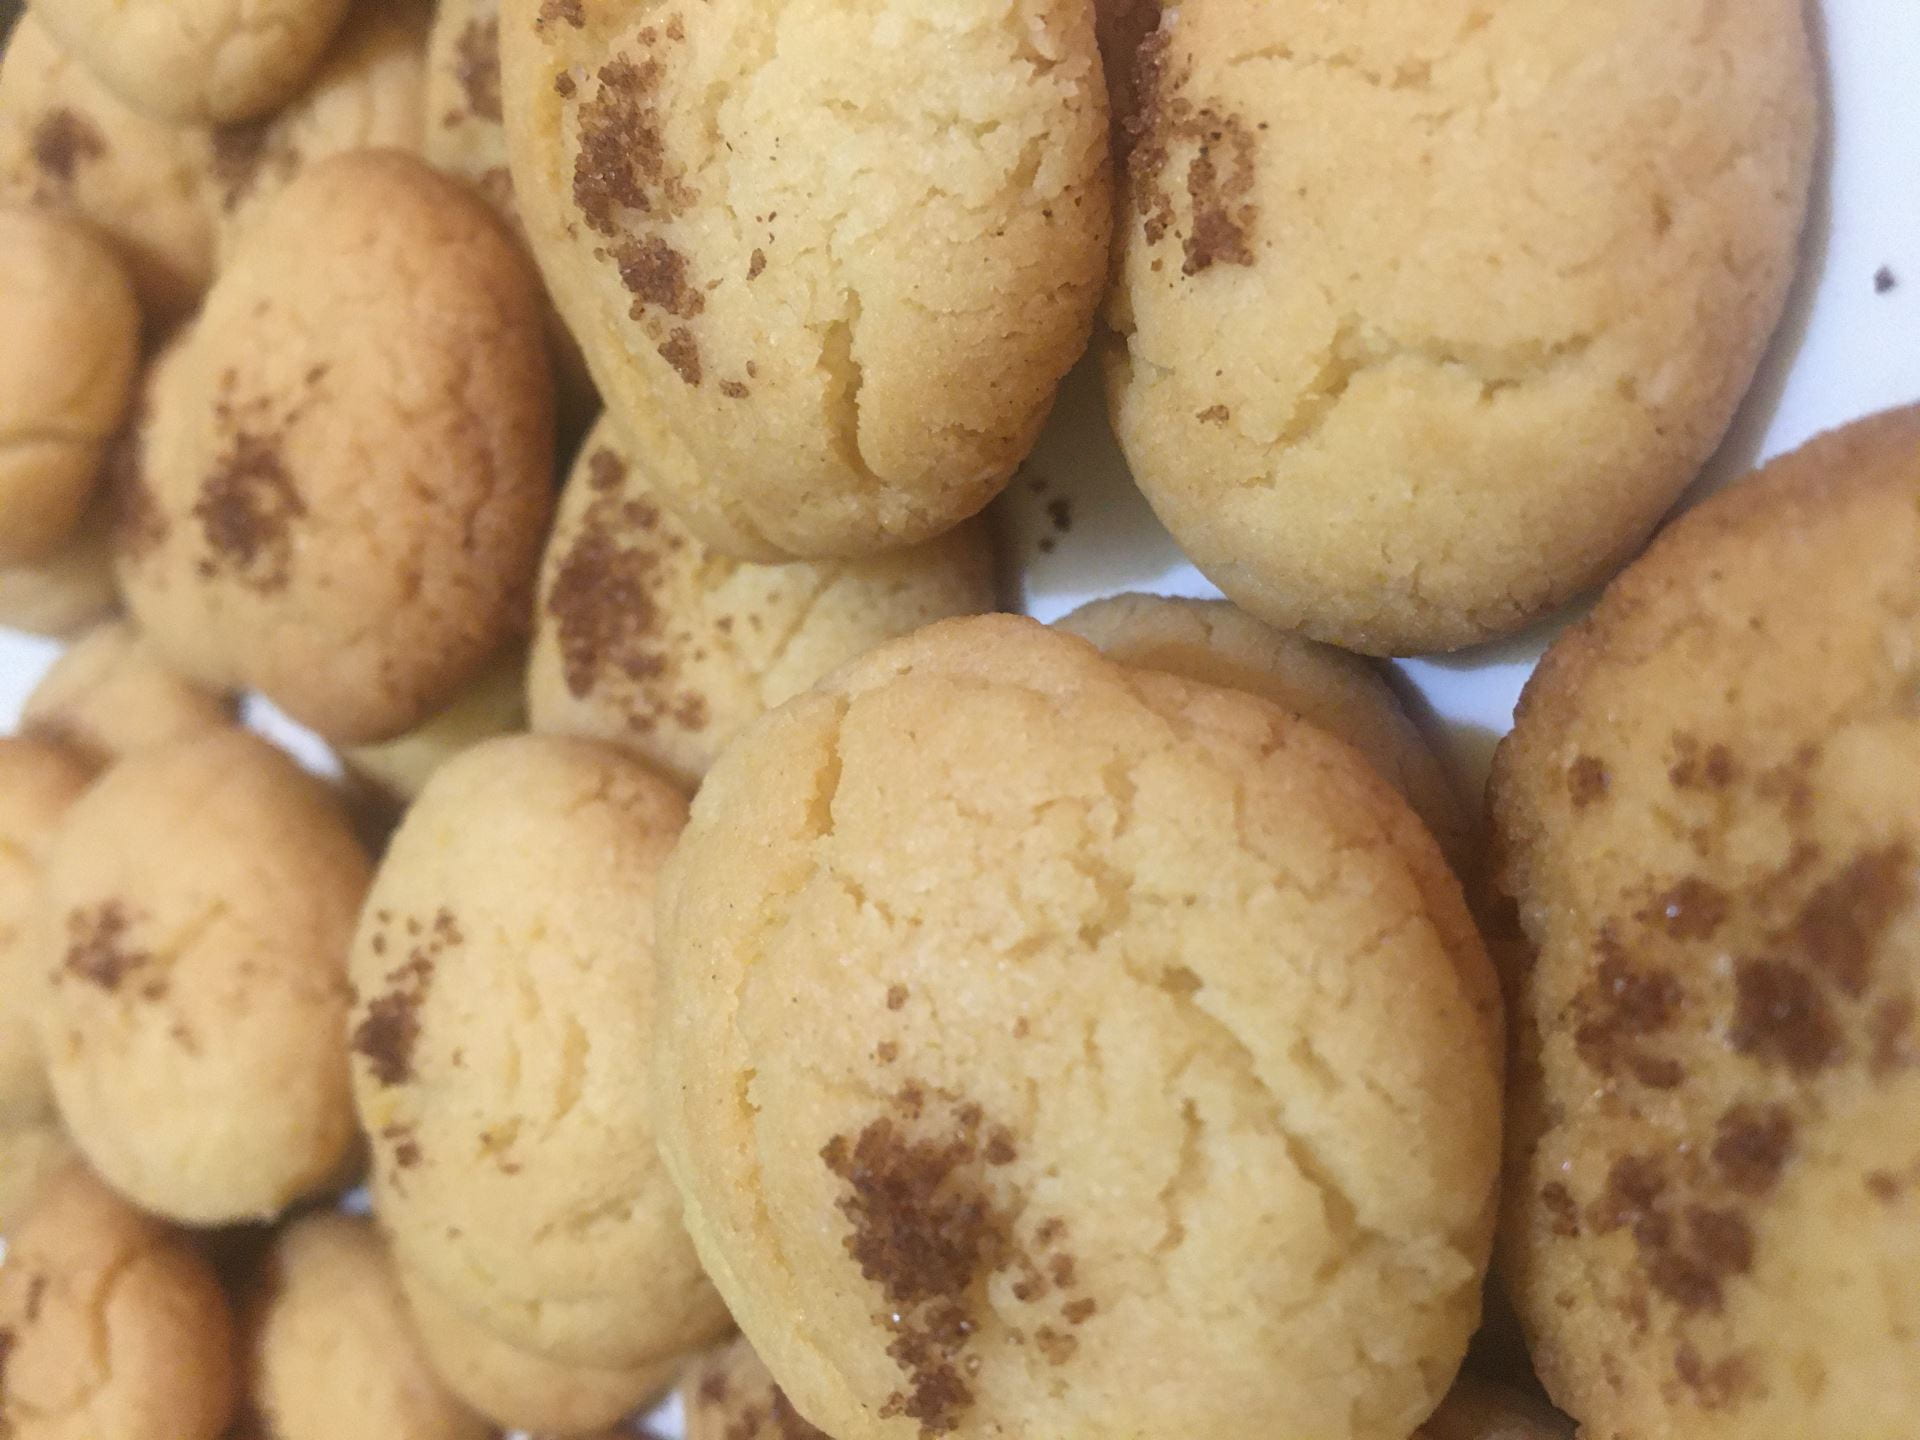
When I made these in the past, I would put some drops of food colouring into the dough when I was done making it to add a bit of colour. The first time I did this I just wanted the cookies to be coloured, but when I mixed it, it didn’t turn the dough blue (or whatever colour I was using), it made speckles of that colour evenly throughout the dough which looked even better! This time, I was contemplating doing that, but I decided to sprinkle some cinnamon on top of them at the end (as you’ll see in the pictures).

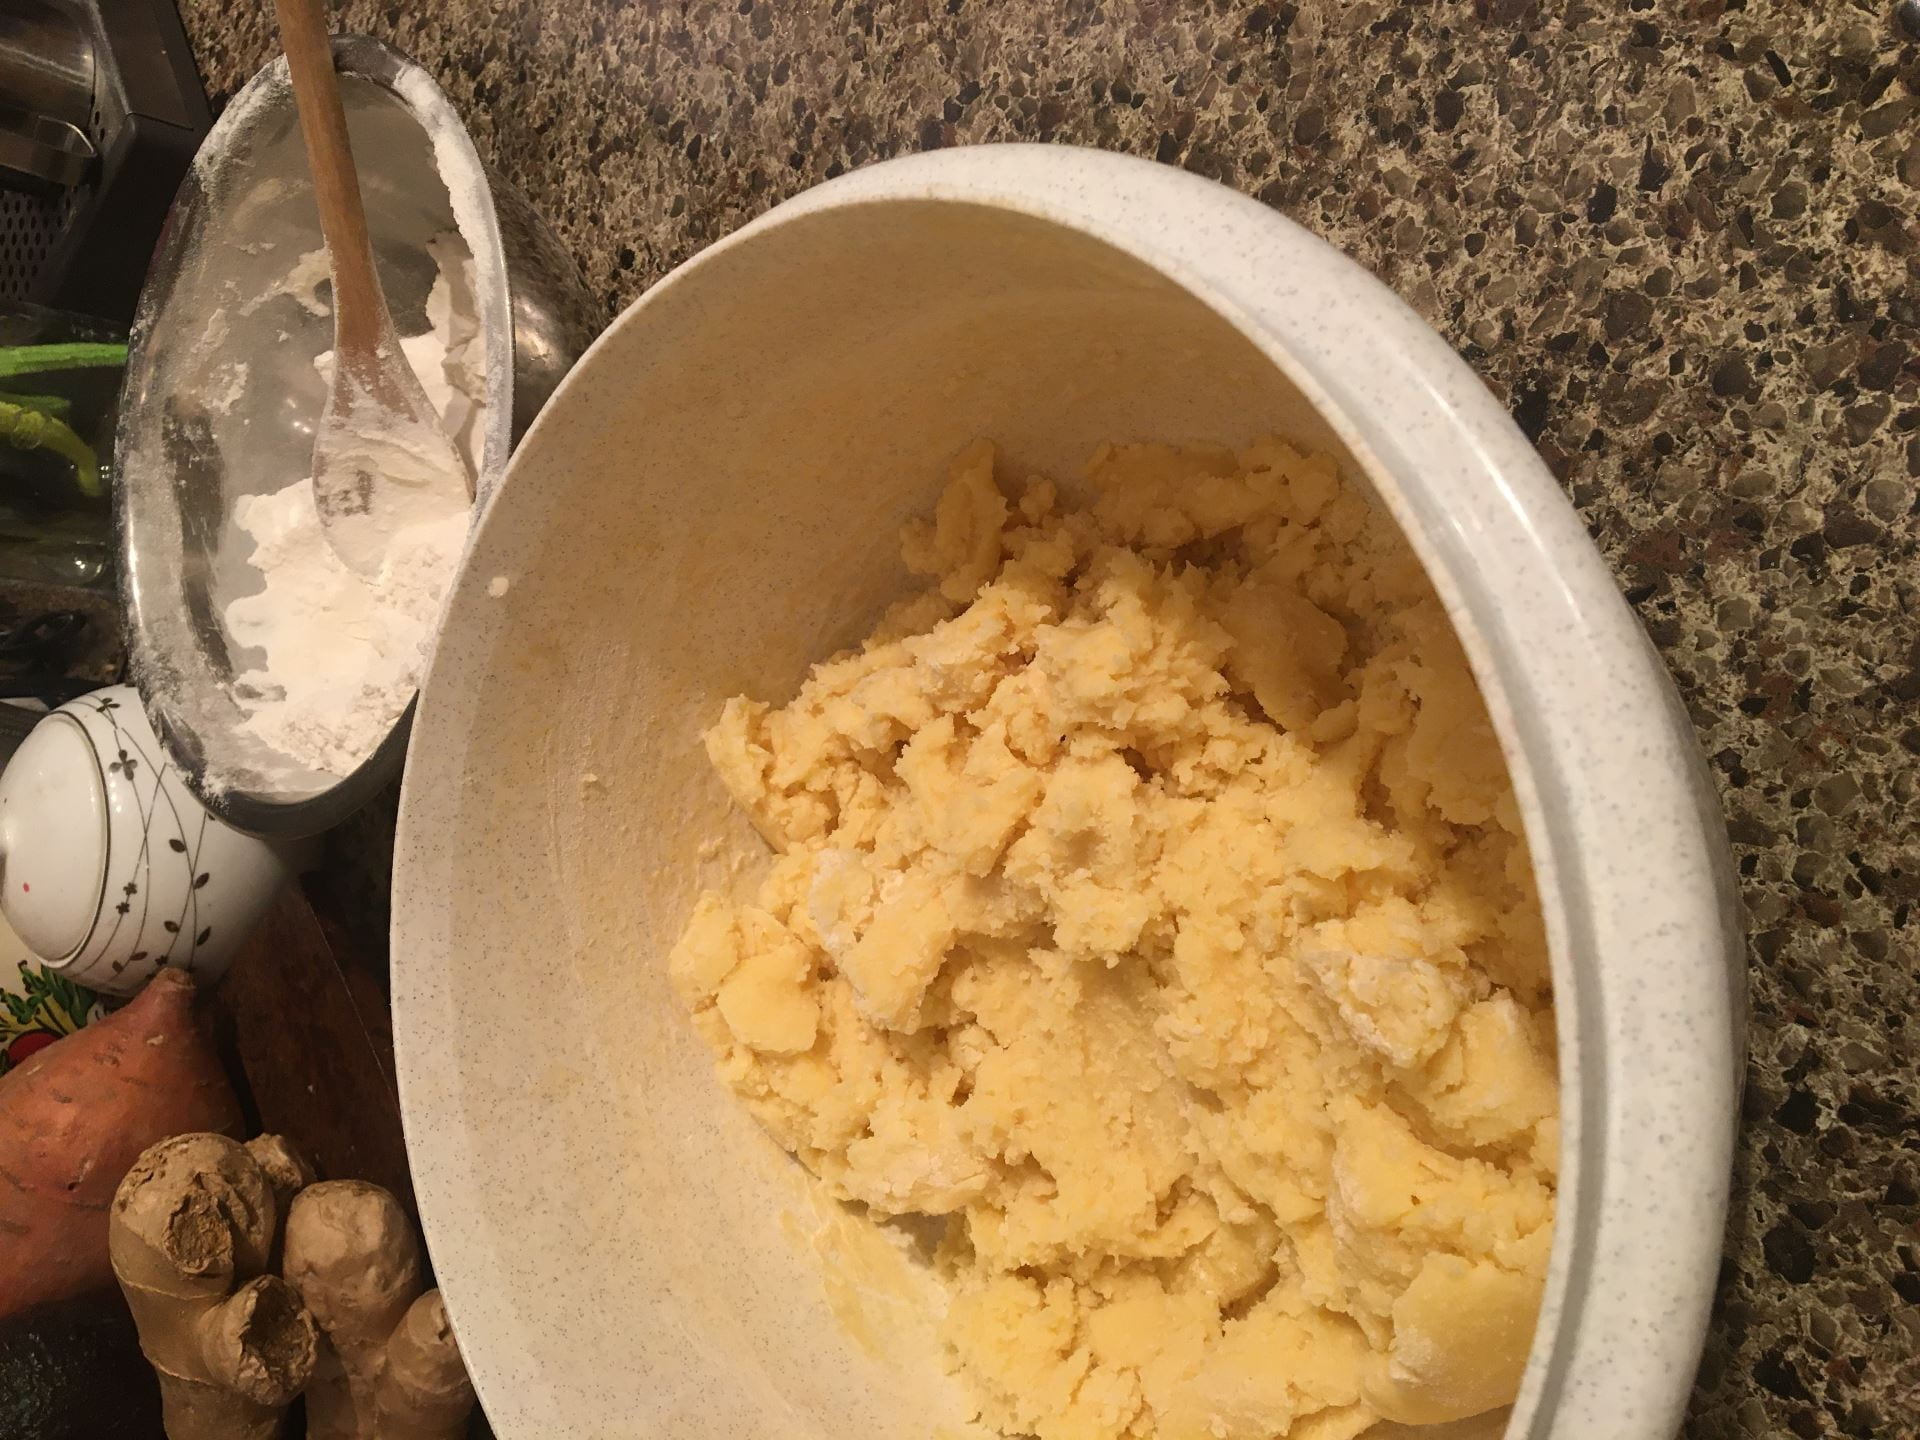
I didn’t have to change much to the recipe, but I did have to substitute the vanilla extract with almond extract, which, I discovered today, is a thing. It gave the cookies a nice almond-y flavour, and I think I will stick to this substitute in the future. In the end, the cookies turn out great. Nicely browned, and just chewy enough. Next time I would like to mix cinnamon into the sugar and butter at the beginning. I think that would make them taste even better.


INGREDIENTS

-2 3/4 cups all-purpose flour

-1 teaspoon baking soda

-1/2 teaspoon baking powder

-1 cup butter, softened

-1 1/2 cups white sugar

-1 egg

-1 teaspoon vanilla extract**or almond extract

RECIPE

-Preheat oven to 375 degrees F.

-In a small bowl mix flour, baking soda and baking powder. Set aside.

-In a large bowl, cream together the butter and sugar until smooth.

-Beat in egg and vanilla.

-Gradually blend in the dry ingredients.

-Roll rounded teaspoons of dough into balls, and place onto ungreased cookie sheets.

-Bake 8-10 minutes, or until golden brown.

-Ya done.

Food blogging, Week 7

For our foods week 7 assignment, I chose to make a frittata. I chose to make this because when I was looking through recipes online, I came across some sort of omelette/frittata and remembered when we made them in class. I still had my foods duo tang in my backpack with all my recipes, so I thought I’d stick with that. At first I wanted to make a ‘pesto frittata’ without the use of pesto, to see how it would taste (so just the ingredients mixed in with the egg). This was inspired by one of my pictures from our week 6 assignment, “Food Photography”. I put the ingredients for pesto on a plate, with the exception of pistachios instead of  pine nuts. After I took the pictures I mixed the ingredients in a bowl and ate it, which, to my surprise, tasted just like pesto. Because of this, I was low on some on the ingredients, like basil and nuts (we literally didn’t have any nuts in the house, which might of been a good thing, ’cause I don’t know exactly how good a pistachio frittata would be). I ended up using the little amount of basil we had left, garlic, parmesan and chives (for a bit of extra seasoning). I wanted it to be simple, but still have lots of flavour. The frittata turned out pretty well… my family finished it within 10 minutes :). The flavour of the garlic, basil and chives went nicely with the eggs, and it looked really good too! The top was golden, and the ingredients that you could see from the top looked nicely spaced out. Overall, it turned out to be a pretty good frittata.


Ingredients:

-three eggs (and a bit of milk)

-two-ish table spoons of parmesan cheese (grated)

-two cloves of garlic

-All the garlic I had left (about half a custard cup)

-three chive strands(?)

-Salt and pepper


Recipe:

  1. Get out all of the ingredients
  2. Preheat the oven (I set mine to 250 F)
  3. Thinly slice the garlic and chop the chives
  4. Crack the eggs into a bowl/cup and add a bit of milk
  5. Whisk the eggs, then add the herbs and spices
  6. Pre-cook the garlic in a frying pan with a bit of butter (cook it to your liking)
  7. When the garlic is ready, add the egg mixture and jiggle the handle to spread the egg around
  8. Keep cooking the egg, lifting the edges now and then with a rubber spatula to make sure it doesn’t stick to the pan
  9. When the edges are forming bubbles and the middle is almost fully cooked, sprinkle the cheese around the top, and put it in the oven for 1-2 minutes
  10. When it looks golden brown and ready, take it out and transfer it to a plate of trivet
  11. Slice and serve

Foods 9 Food Photography

This is my Foods 9 Food Photography assignment. Hope you enjoy!

(Just a teaser)

~~~~~~~~~~~~~~~~~~~~~~~~~~~~~~~~~~~~~~~~~~~~~~~~~~~~~~~~~~~~~~~~~~~~~~~


The first ‘photo shoot’ I did was with a teapot, a slice of cheesecake, my glasses, and some other things from around the kitchen.

I was originally just going to use the cheesecake and the teapot, but I wanted more colour to pop. First I added my rose gold glasses and cleaning cloth to accent the pink in the cheesecake, then I added some basil leaves as a garnish to add a bit of green (It wouldn’t taste very good, but it gave me what I was looking for). Finally I added a small detail to tie in the last bit of green; the tag on the tea bag (peppermint green tea).


~~~~~~~~~~~~~~~~~~~~~~~~~~~~~~~~~~~~~~~~~~~~~~~~~~~~~~~~~~~~~~~~~~~~~~~


For my second photo shoot (and also my favourite), I stuck with the same theme as the first, but simplified it.

No more tea pot and cheesecake, just a nice cup of tea on the dock.

For these pictures, I really wanted to focus on the simplicity of the cup, while also acknowledging the lake and mountain in the background. This is one of my favourite types of photos to take, where the camera is focused up close on an object, yet there’s still something to look at in the background.

The second part of this shoot was sort of to symbolize two things; don’t judge a book by it’s cover/too show your true colours, and too much of a good thing is a bad thing.

The first bit is kind of like this: you don’t know if something is good or bad just by looking at it. when you tip over a cup, you may try what you think is sugar, only to get a mouth full of salt.

And, I think ‘too much of a good thing’ is a bit self explanatory. Too much sugar=not good. While a bit of sugar in your tea can be nice, try half a cup, and prepare for a headache.


~~~~~~~~~~~~~~~~~~~~~~~~~~~~~~~~~~~~~~~~~~~~~~~~~~~~~~~~~~~~~~~~~~~~~~~


The third shoot I did was a ‘deconstructed pesto’.

For this picture, I wanted each ingredient to be separated on the plate, so there was still a lot going on, but in a ‘calm’ way, I guess. At first, I tried different angles from above, and the side, but none of them turned out as nicely as this one. The ingredients I used were pistchios, basil, garlic, parmesan and olive oil. I would’ve used pine nuts, but I didn’t have any.

This picture looked good, but also tasted good! When I was finished taking pictures, I cooked up the garlic, and since I didn’t have a blender, I put all the ingredients into a bowl and ate it like a salad. I was suprised that it actually tasted like fresh pesto! My sister on the other hand was surprised that I would eat it at all.


~~~~~~~~~~~~~~~~~~~~~~~~~~~~~~~~~~~~~~~~~~~~~~~~~~~~~~~~~~~~~~~~~~~~~~~


The last photo shoot I did was this:

In these pictures, I really tried to play with the lighting. The candles, chives, ginger and egg were  set up on a chair with a slotted back. the chair was faces away from the window, so the sun could shine through (in the second photo), and the other two were in the direct sunlight, or in the shade. I tried a few with the candles lit, but it was too bright and it didn’t work out as well.