Final Food Blogging:One Banana-Banana Bread

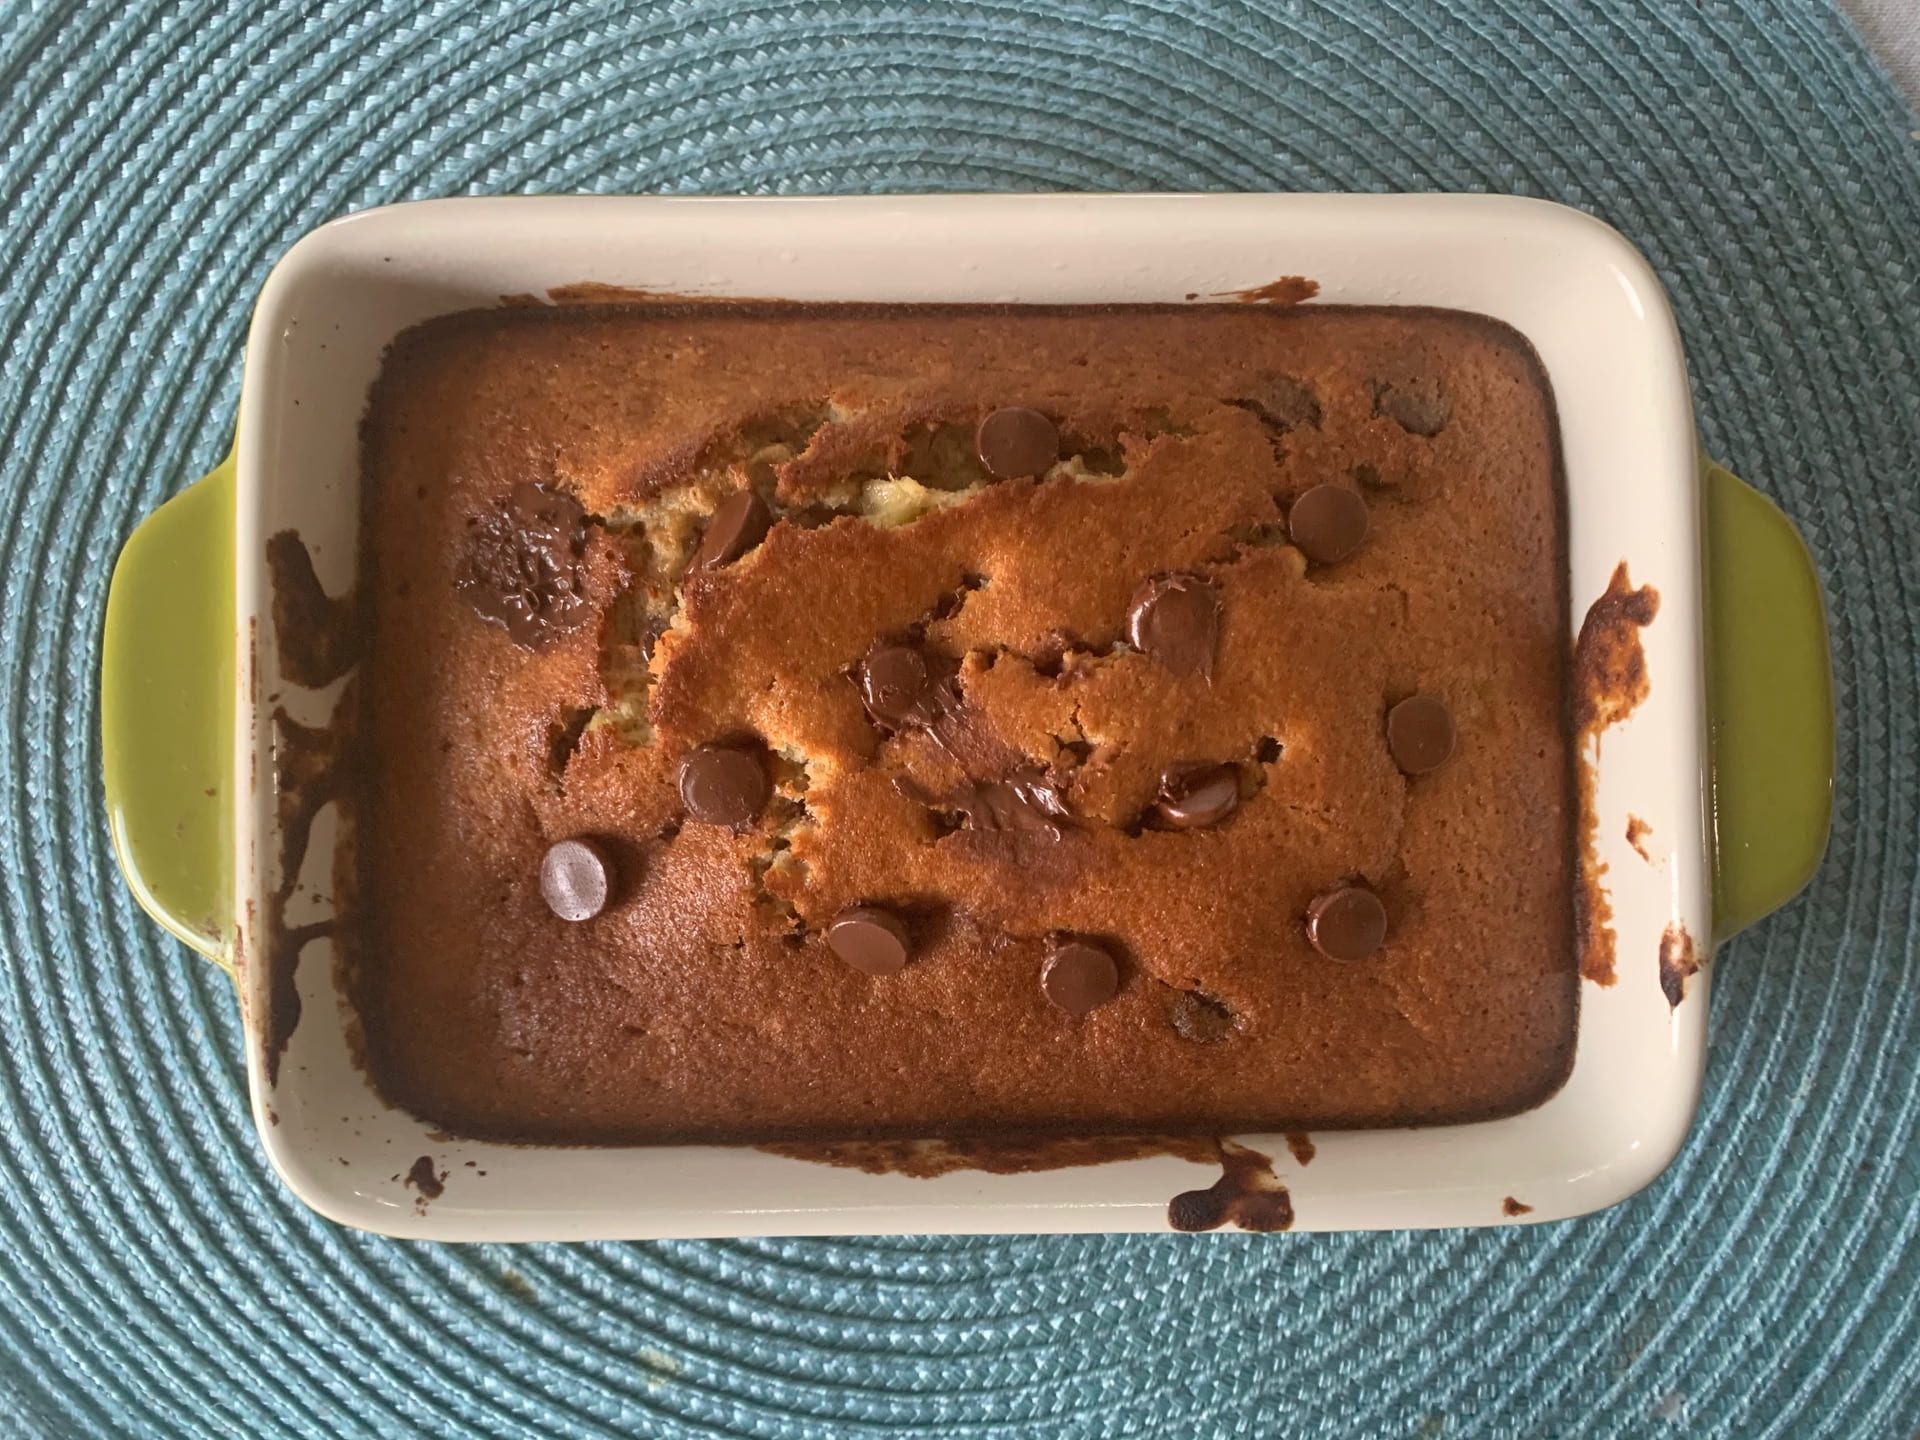
For my dish, I decided to make banana bread. Like many others, I’ve made banana bread a few times during my extra time at home. My family was asking for me to make another loaf, but I only had one banana to use. I decided to find a new recipe that only required one banana but still had enough flavour to make up for it. It was also good that I made this recipe because the banana I had was very brown, and it probably would’ve been thrown out soon anyways. I had most of the ingredients required for the recipe, but I did make some changes. For example, it required granulated sugar and brown sugar, but I only had brown sugar, so I just added brown sugar. I didn’t want my banana bread not to be sweet enough, so instead of adding walnuts, I tossed in some chocolate chips. I did learn later that I may have made it too sweet when the bread came out because I added too many chocolate chips. I didn’t measure them out and thought I could eyeball how much was enough. My family did still enjoy the banana bread, though. Because this was a smaller loaf, we split it evenly and ate it together in one sitting, which was nice. I was expecting not to taste as much banana, but to my surprise, it tasted almost as flavorful as my other banana bread recipe. If I ever made this banana bread again, I think I would try it with walnuts for more of a healthier option.

Serving: 6

Ingredients

  • 1 ripe banana
  • 1 egg
  • 1 teaspoon vanilla extract
  • 3 tablespoons olive oil
  • 1/2 cup + 1 tablespoon all-purpose flour
  • 1/4 cup granulated sugar
  • 1/4 cup brown sugar
  • 1/4 teaspoon baking soda
  • 1/4 teaspoon salt
  • 1/2 cup chopped walnuts(or chocolate chips)

Instructions

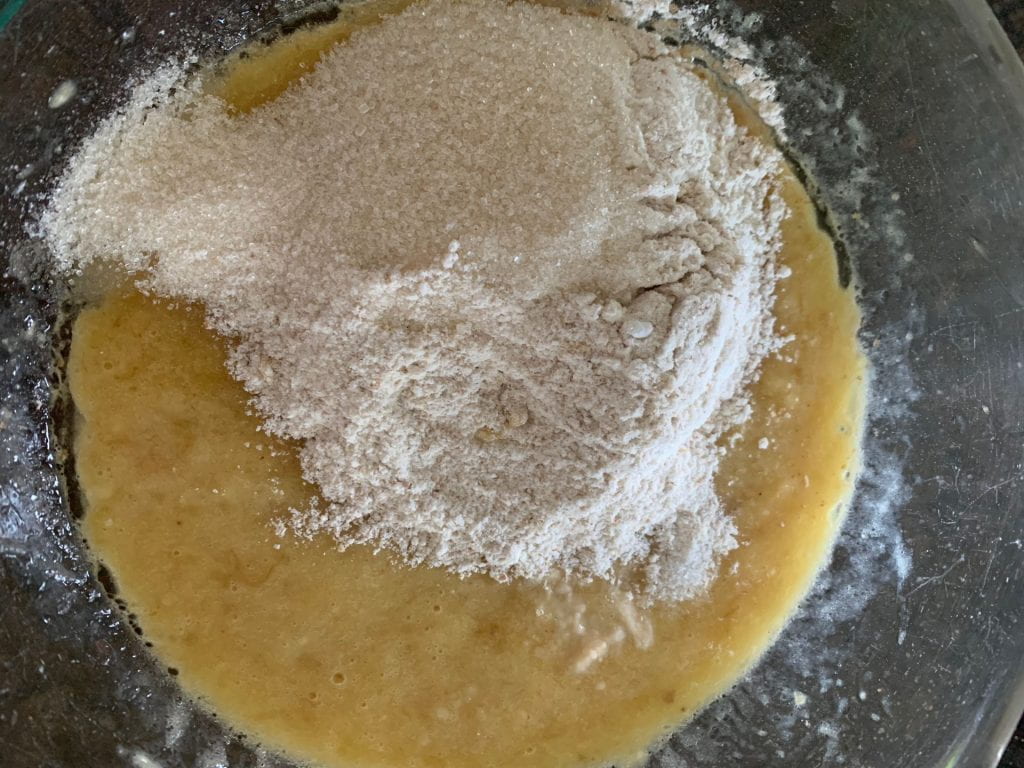
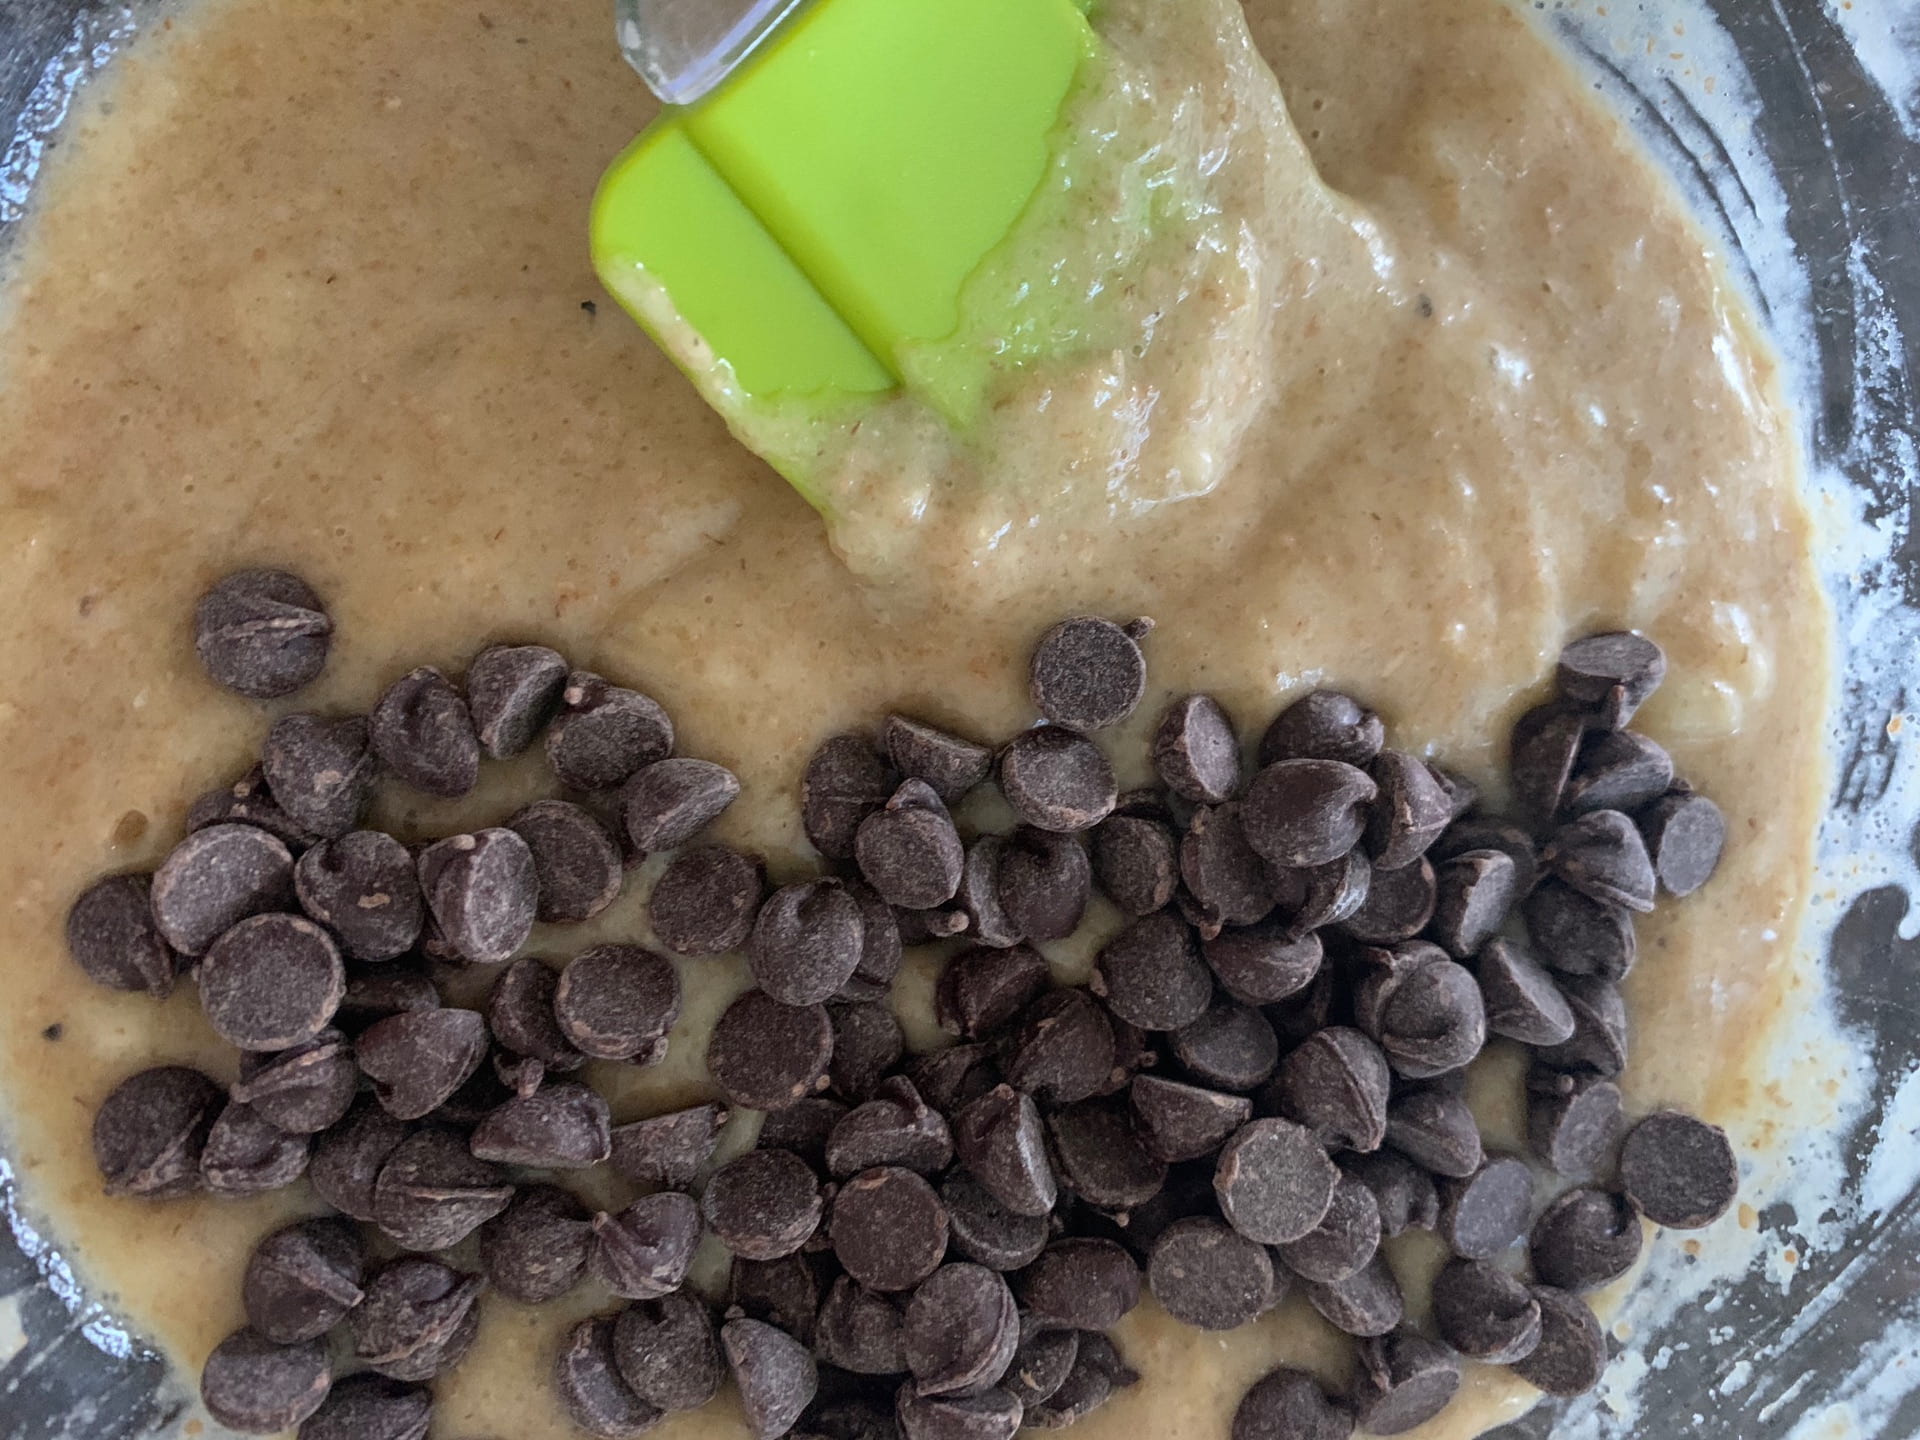
  • In a medium size mixing bowl, mash the banana. Then stir in the egg, vanilla extract, and oil until combined. Then add all at once the flour, sugars, baking soda, and salt. Fold until combined. Then stir in the chopped walnuts/chocolate chips.

  • Spoon into your prepared (oiled or lined with parchment) baking vessels and bake at 325°F.

  • Regular size muffins or a baked donut pan will yield six and should be baked for 14-15 minutes.If you use mini loaf pans, this will yield three and should be baked for 18-20 minutes.


Food Photography

These are the items I picked out from around my kitchen. I tried to pick out a mix of simple neutral props and more colourful eye-catching props. I took a birds-eye view picture of my props to show how some may look when placed beside each other, for potential prop combinations. I like how this photo has a variety of unique kitchen appliances and items. After taking and analyzing my pictures, I learned that the simpler props looked better than, the more colourful ones. I found that the colourful props took some of the spotlights of the food that was meant to be the centrepiece, whereas the simpler props made the pictures nicer and more pulled-together without being the main focus.


The first food I photographed was of a simple dish of salmon and rice. I’ve made a similar dish with my Japanese aunt before, so I wanted to include a part of her culture in this picture. This is why it added the bamboo mat, the chopsticks and the cherry blossom tree tray. What I like about the combination of these three items is that they don’t take away from the centrepiece, the salmon and rice, but add a story aspect to the photo. The vibrant red chopsticks bring out the red of the petals on the tray. The bamboo offers a barrier between the tray and the meal, focusing not on the cherry blossom tree but the salmon and rice.


The second pictures I took was of a bowl of blueberries and blackberries. I included two pictures of this fruit bowl because I liked how each of them gave different impressions. For example, the first one makes me feel like this is the “final product,” and the dish is simply a bowl of berries. I think I get this impression because I took the picture at a birds-eye view angle, making the bowl seen as a whole instead of each individual berry. The placemat underneath also gives the illusion that the bowl is placed out to be served.

On the other hand, the second picture gives the impression that these berries are just one ingredient in a recipe, perhaps they were freshly picked to make a jam, or to be used as pie filling. The picture is taken closer and more on an angle. This combination brings the focus more onto each separate berry instead of all of them as a whole. I find these two pictures interesting because, in the first one, the blueberries are more dominant, whereas, in the second one, the blackberries are more noticeable.


The last picture I took was a fresh mint, and kale picked from my backyard’s garden. With this photo, I tried to capture the greens’ simplicity without making it look too dull. This is why I included the strainer in the background that was used to wash the greens a few moments before. I like how the strainer is also green, so it doesn’t take the attention away from the mint and kale upfront but offers a sort of accent in the back. I made sure to use bright natural lighting to show how nature likes to make her greenery appear.

Food Blogging

The recipe I decided to make is a called Tahchin, a traditional dish that comes from Tehran, Iran. Although it’s quite an odd mixture of ingredients, it’s very delicious but yet simple. Tahchin is a sort of staple food in my house, my mom makes at least once every two weeks. The cool thing about this Tahchin is that it’s a very versatile dish. Make a single serving one for yourself or make a few layers and add dried fruit and nuts for a perfect party meal. It can also be eaten warm or cold, depending on your preference. Depending on what you want more or less of, the quantities of the ingredients can be modified as well. I chose to make Tahchin because I wanted to learn how to make this dish as it’s a part of my culture. To my surprise, it was easier than I thought, and I was pretty proud of the result. My family enjoyed it and said it tasted just like how my mom makes it! Although it ended up being an overall success, something that I’ll keep in mind for next time is to turn the heat down a bit as the outer “crust” was a little darker than I intended. While cooking this dish, I learned that it doesn’t take that much effort or ingredients to make a seemingly fancy meal. Tahchin is an excellent dish, especially for picky eaters that want to try something new as it’s ingredients are so simple, yet the recipe still has a unique cultural aspect.


Ingredients:

-half a white onion

-1 pound of chicken thigh or breast

-4 cups of white rice

-5 eggs

-3 cups of plain yogurt

-salt

-pepper

-cooking oil

-saffron


Recipe:

1. Start by dicing half an onion

2. Place chicken in the pan with the onions, one teaspoon of salt, a pinch of pepper and saffron, and a cup of water. Cover with lid and turn stove to medium heat. Cook until soft on both sides.

3. In a pot, wash rice and add 8 cups of water. Cover with lid and let cook on medium heat. Stir occasionally.

4. While chicken and rice are cooking, get a big bowl and combine eggs, yogurt, one teaspoon of salt, a pinch of pepper and saffron and one tablespoon of oil. Mix with a spoon or whisk.

5. When rice is almost fully cooked, strain the rice and combine it with the egg and yogurt mix.

6. When chicken is cooked, cut into in thick strings, about an inch long.

7. In a non-stick pot, spread one tablespoon of cooking oil along the bottom of the pot and a few inches on the sides.

8. Flatten 1/3 of the rice mixture on the bottom of the pot, place half of the cut chicken on top. Repeat and finish with the rest of the rice.

9.Place pot on low heat. Rap pot lid with a towel. Let cook 2 hours, use a wooden spoon to check the sides occasionally, generally cooked when golden brown.

10. Once cooked to the desired time, place a round tray big enough to cover the pot, and flip Tahchin onto the tray. (optional: scatter cooked dried fruit and diced nuts on top for extra design and flavour)

11. Cut into cake-like slices and serve!


Design Idea

Our product is going to include a removable bowl, an attached scale, a food holder on the back, on a screen we will have multiple settings including a clock/timer with how much the food is in the bowl as well as how much food is in the food holder. At whatever time the timer is set, the food will dispense onto the bowl and it ready to be eaten. If the dispenser is weight based, anytime the contenants of the bowl lower to a certain weight, the dispenser will refill it. You can set how much and when you want your pet to be fed based on yours and your pets needs.

Product Idea

Our idea is to make automated pet food dispenser using coding. This would solve people’s problems of always having to refile their pet’s food bowl. The product would refile the pet food based off a timer as well weight refile settings. This ensure that pets are getting the necessary amount on food based off their personal needs. Our product will help pet owners feed their pet’s when they’re not home or are not around their pets. We will create our product by using microbit.